
Making the perfect cup of coffee at home is a gratifying experience, and for many coffee enthusiasts, mastering the art of steaming milk is key. I remember struggling with this task on my Breville Barista Express—endless attempts with frothy, inconsistent milk or, worse, burnt milk that ruined my espresso. However, after some persistence and plenty of practice, I’m now able to achieve the creamy microfoam I once thought impossible. If you're facing similar challenges or simply want to refine your milk-steaming technique, follow this step-by-step guide to unlock the full potential of your Breville Barista Express. Uncover the brewing precision of the Breville Dual Boiler BES920XL review
Getting to Know the Breville Barista Express Steam Wand
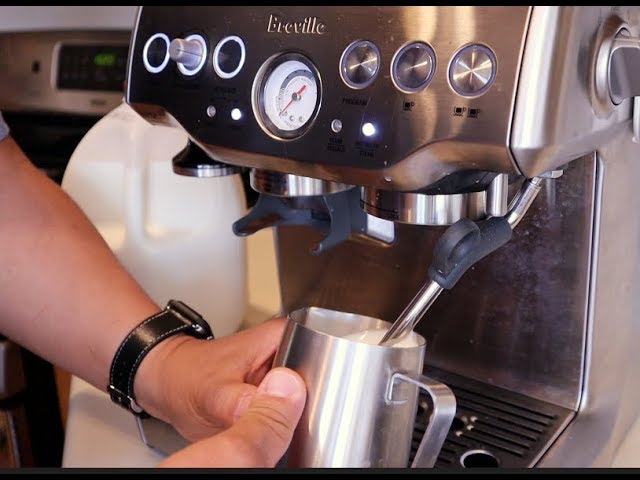
The Breville Barista Express is known for its robust espresso-making capabilities, but its steam wand is equally impressive. The wand’s 360-degree swivel makes it easy to position for optimal steaming, and with the right technique, it can help you craft perfectly textured milk at home. Learn how this model blends convenience with innovation in the Breville Barista Touch Impress review
Before you begin, make sure your machine is fully heated. You’ll know it's ready when the indicator lights show green. Rushing this step can lead to disappointing results, as I discovered early on. Allow the machine to warm up completely before you start steaming for the best texture and consistency. Compare these top models to find your perfect match in the Breville Barista Express Impress vs Pro review
Preparing Your Milk
Choosing the right milk is essential for creating great microfoam. Whole milk is my go-to because of its creamy texture and rich foam, thanks to its higher fat content. If you're looking for a lighter option, skim milk can work, but it won’t produce as thick a foam. See what makes these machines stand out in the Breville Barista Pro vs Express review
For those using plant-based milks, the results can vary depending on the type. Oat milk—especially the barista variety—tends to produce the most consistent foam. Almond and soy milk can also work, but they often behave differently due to variations in protein and fat content. Explore the key differences between these premium machines in the Breville Oracle vs Oracle Touch review
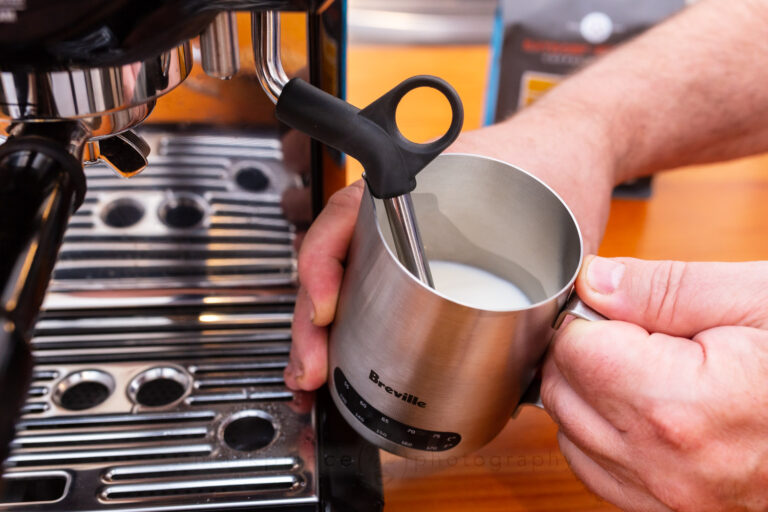
Use a stainless steel milk jug, as it helps with heat conduction and gives you the tactile feedback you need while steaming. Fill the jug about one-third full, just below the spout. Cold milk is ideal as it gives you more time to stretch and texture the milk without overheating it too quickly.
The Steaming Process: Step-by-Step
Purge the Steam Wand
Before you start steaming, purge the steam wand briefly to eliminate any residual water. This step ensures you're working with dry steam, which is essential for achieving the perfect microfoam. Skipping this step can lead to watery steam and poor texture.Position the Steam Wand Correctly
Proper positioning is key to good foam. Place the tip of the steam wand just below the surface of the milk, near the jug's spout, and angle the jug slightly. This helps introduce air into the milk and creates the whirlpool motion that is crucial for smooth, consistent texture.Stretch the Milk (Incorporate Air)
Turn the steam knob to full power and listen for the hissing sound that indicates air is being introduced into the milk. Keep the steam wand just below the surface for the first few seconds to stretch the milk and incorporate air. Be careful not to overdo it—too much air will create large, undesirable bubbles.Texture the Milk (Create Microfoam)
After 3-5 seconds of stretching, raise the jug slightly to fully submerge the steam wand. The goal now is to heat the milk while maintaining the whirlpool effect, which breaks down any large bubbles and creates a smooth, velvety microfoam. The texture should be glossy and reminiscent of wet paint.Monitor the Temperature
You’ll know the milk is at the right temperature when the outside of the jug becomes too hot to touch for more than a second, usually around 150°F (65°C). If you want more precision, you can use a thermometer to ensure you don’t overheat the milk. Going past 170°F (77°C) will burn the milk, leading to an unpleasant taste and destroying its sweetness.Shut Off the Steam
Once your milk is steamed to the right temperature, turn off the steam knob before removing the wand to avoid splattering. Always prioritize safety when handling hot equipment.
Final Touches
Tap and Swirl
Gently tap the milk jug on the counter and swirl it to eliminate any remaining large bubbles. This step gives your milk a glossy, smooth finish. It’s easy to skip, but trust me, it’s essential for achieving perfectly consistent foam.Clean the Steam Wand
Immediately clean the steam wand after each use by wiping it down with a damp cloth and then purging it again. This prevents milk residue from building up and keeps your machine in good working order.Pour the Milk
For pouring, start high to mix the milk with the espresso, then lower the jug as you get closer to the cup. If you're feeling adventurous, you can even try your hand at latte art. The key to beautiful designs is consistent, well-textured milk, so once you’ve perfected that, you’ll be ready to impress.
Tips and Tricks for Better Steaming
Practice Makes Perfect
Steaming milk is a skill that improves with practice. If your foam is too bubbly or thin, don’t get discouraged—keep practicing, and soon you’ll find the right technique that works for you.
Use Fresh Milk
Always use fresh milk, as it froths better and produces a more stable foam. Avoid using milk that’s nearing its expiration date or has been opened for too long.
Experiment with Different Milks
While whole milk is ideal, don’t hesitate to experiment with plant-based milks. Barista-grade oat milk usually performs the best, but others like almond and soy can still provide satisfactory results if handled correctly.
Common Mistakes to Avoid
Over-Aerating the Milk
Incorporating too much air is a common mistake. This leads to overly frothy milk rather than smooth, creamy microfoam. Aim for a subtle hissing sound and only add air in the first few seconds.
Overheating the Milk
Overheated milk loses its natural sweetness and can taste burnt. Always stop steaming once the milk reaches around 150°F (65°C), or when it’s too hot to touch comfortably.
Neglecting the Steam Wand
Failing to purge and clean the steam wand before and after use can lead to clogs and poor performance. Regular cleaning is vital to maintaining your machine and getting the best milk froth.
Exploring Latte Art
Once you’ve perfected your milk-steaming technique, consider trying your hand at latte art. Start with simple shapes like a heart or a rosetta, and don’t worry if your first attempts aren’t perfect. With time and steady hands, you’ll be crafting intricate designs that will impress anyone.

Conclusion: Mastering Milk Steaming for Café-Quality Drinks at Home
Mastering the art of steaming milk on the Breville Barista Express has transformed my at-home coffee experience, enabling me to create beverages that rival those from my favorite coffee shops. With patience, practice, and a little attention to detail, you too can produce perfectly textured milk every time. Whether you're aiming for a flawless latte or experimenting with latte art, the rewards are well worth the effort. So, fire up your Breville Barista Express, grab your milk jug, and start steaming—your perfect cup of coffee is just a few steps away!
FAQ
Q: Why does my milk always have large bubbles?
A: Large bubbles are often caused by over-aerating the milk or positioning the steam wand too close to the surface for too long. Try submerging the wand slightly more and adding air only in the first few seconds.
Q: What’s the best type of milk for steaming?
A: Whole milk is the best option for creamy, thick foam. If you’re using plant-based milk, barista-style oat milk is a great alternative.
Q: How can I tell when the milk is the right temperature?
A: The jug should become too hot to touch comfortably after about 1-2 seconds. This corresponds to a temperature of around 150°F (65°C). A thermometer can offer more precision.
Q: Why is purging the steam wand important?
A: Purging removes residual water and milk, which ensures your steam is dry and prevents clogging. It also keeps your steam wand sanitary.
Q: Can I use plant-based milk for latte art?
A: Yes, but some plant-based milks work better than others. Oat milk tends to froth the best, especially when using barista versions.